![How to Fix YouTube There Was A Problem In The Server [400] Error?](https://www.hatauzmani.com/uploads/images/202403/image_380x226_65f1745c66570.jpg)


How to Fix Windows 11 Blue Screen on Startup
Windows 11 was introduced on June 24, 2021 and showed it to its users. Of course, as in every Windows version, there will be Windows 11 Blue Screen Error in this case.
Since the release of Windows 11, it has brought many errors with it, leaving users very hesitant to upgrade from Windows 10 to Windows 11. He says that Windows 10 users have encountered various errors with the upgrade to Windows 11.
The blue screen error that occurs in all versions of Windows is unsurprisingly bringing it to Windows 11. Since users do not know exactly what to do when they encounter such an error, they try to fix the problem by formatting the computer. But we will save you from the blue screen error with the help of a few commands.
Why Do I Get a Blue Screen Error on Startup in Windows 11?
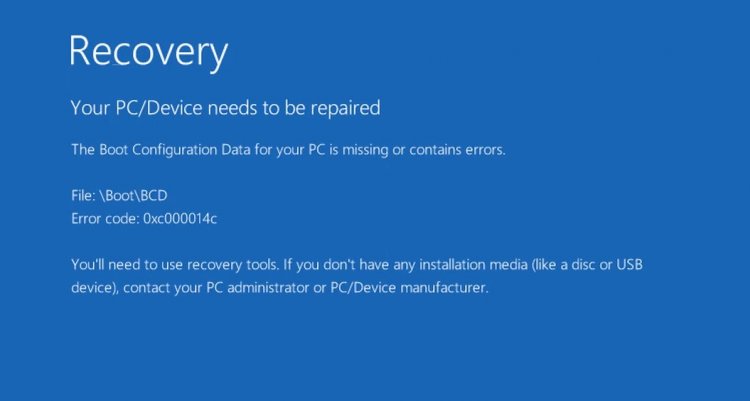
The "0xc000014c Blue Screen Error" that we get on the Windows 11 start screen appears as a Boot problem. Instead of formatting this error, we can get rid of this problem by typing a few command lines with the command prompt.
How Do I Solve The Blue Screen Error On Startup In Windows 11?
First of all, we need to have a USB drive in order to fix this error. If you have a USB drive, we need to install the Windows 10 or 11 media in it and plug it into our computer and run it.
In order to install the Windows 10 or 11 iso file on our USB memory, we need to download the RUFUS program. After completing our download, let's go to the Rufus installation screen;
- First of all, in order to install Windows 10 or 11 iso on our USB memory, it must have a storage of 8GB and above. If our storage meets the requirement, let's get started.
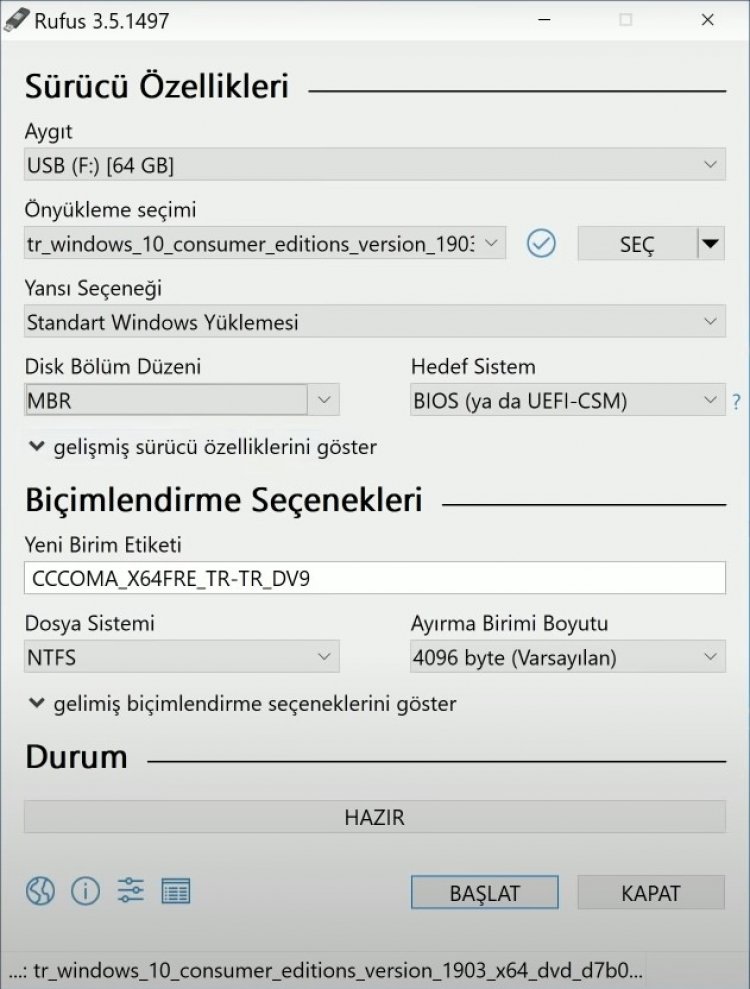
1-) If you have a computer with an old system;
- Let's open the Rufus program.
- On the screen that appears, let's select our USB memory under the Device heading.
- Under the boot selection heading, let's select our iso file.
- Under the Half option heading, select the Standard Windows Installation option.
- Under the partition layout heading, select the MBR option. (The target system will automatically select itself.)
- Then, by pressing the START button, let's say OK to the warning that will appear.
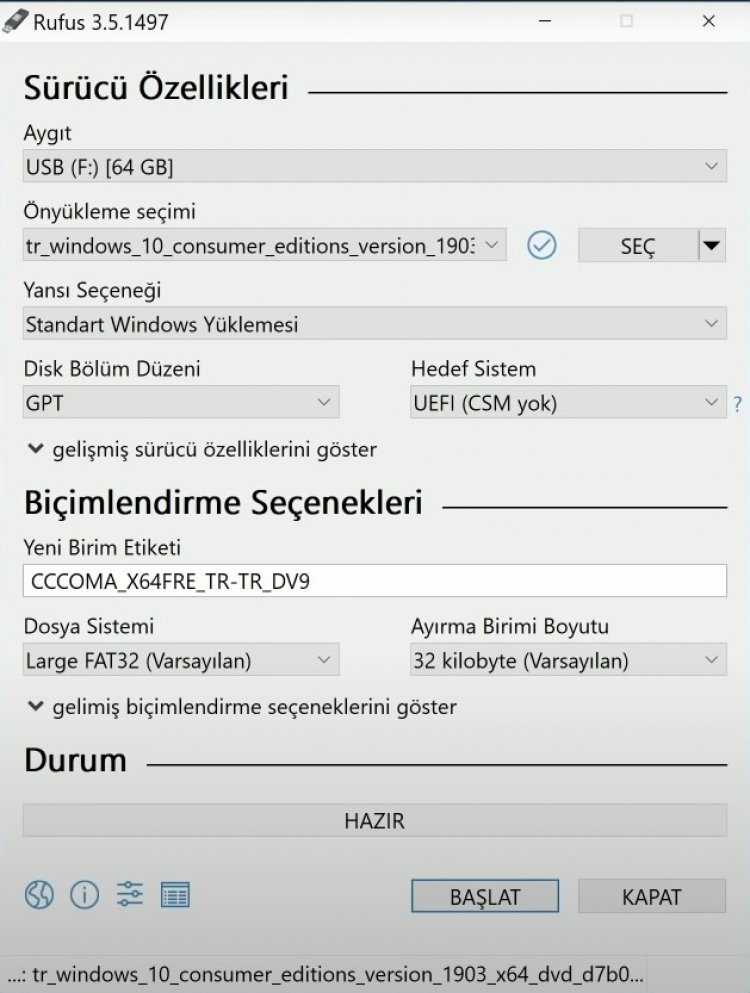
2-) If you have a computer with a new system;
- Let's open the Rufus program.
- On the screen that appears, let's select our USB memory under the Device heading.
- Under the boot selection heading, let's select our iso file.
- Under the Half option heading, select the Standard Windows Installation option.
- Under the partition layout heading, select the GPT option. (The target system will automatically select itself.)
- Then, by pressing the START button, let's say OK to the warning that will appear.
If our iso file is ready, let's get started. Those who have old computers can open the iso file by putting your usb memory in the foreground from the boot screen. If you have a computer with a new system, they can open the iso file by turning on the UEFI option.
- After opening the Windows 10 or 11 media, we run the command prompt by pressing the SHIFT + F10 keys.
- Then, let's write the codes that we will leave below one by one and press enter.
- bootrec /fixmbr
- bootrec /fixboot
- bootrec /rebuildbcd

- After typing the codes in the command prompt, we can easily open our system by restarting our computer.