![How to Fix YouTube There Was A Problem In The Server [400] Error?](https://www.hatauzmani.com/uploads/images/202403/image_380x226_65f1745c66570.jpg)


Valorant Error Code 29 Problem Solution
Although the "Error Code 29" issue that some Valorant players face is not fully resolved, we will talk about a few basic suggestions in this article.

The Error Code 29 issue that Valorant players encounter while connecting to the game can be caused by several problems. Errors such as these bring along various errors and erode the patience of the players. Let's learn together how to fix this error.
What is Valorant Error Code 29?
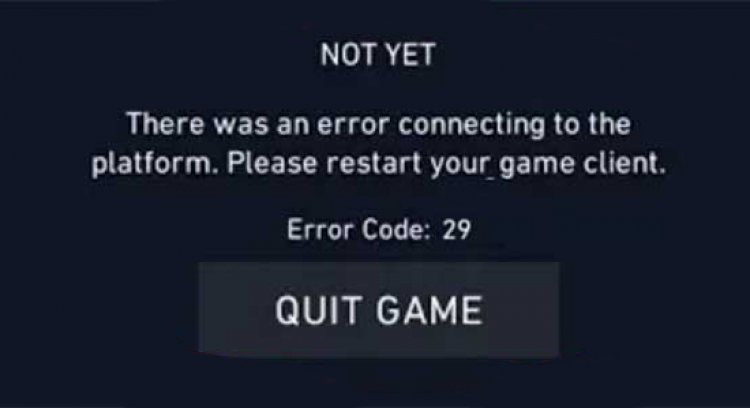
This error code, announced by Riot Games, appears as a network error. If you are having a problem with the network connection, you may encounter such an error. In order to fix the Valorant Error Code 29 problem, we can reach the solution of the problem by performing the suggestions listed below.
How To Fix Valorant Error Code 29?
In order to solve this error, first of all, let's try to restart our computer and try to enter the game again. If the problem persists, let's perform the suggestion below.
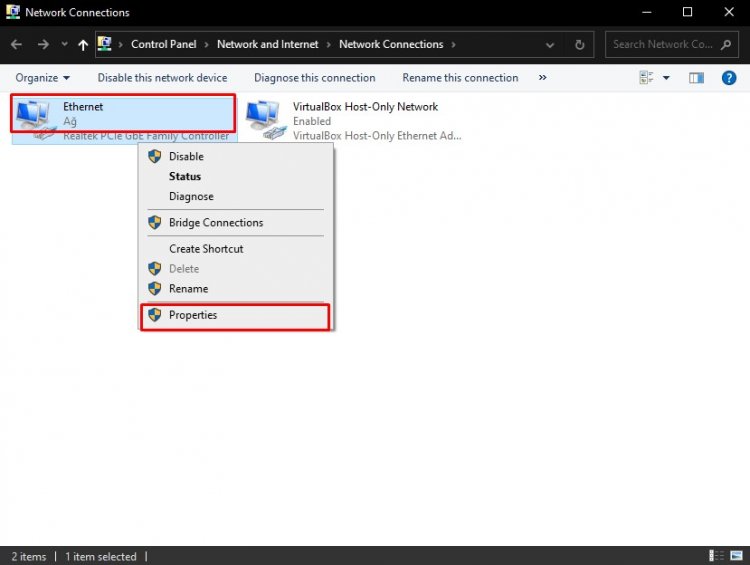
1-) Let's Turn Off the IPv6 Firewall
First of all, we will need to turn off the IPv6 firewall in the Internet Protocol to resolve this error.
- We open it by typing Control Panel in the start search screen.
- On the screen that opens, we open the Network and Internet option.
- Open the Network and Sharing Center option in the tab.
- Open the Change adapter settings option on the left.
- On the screen that opens, right-click on your Network Protocol and open the Properties option.
- If the Internet Protocol Version 6 (TCP/IPv6) option is checked from the Ethernet Properties that opens, we uncheck it.
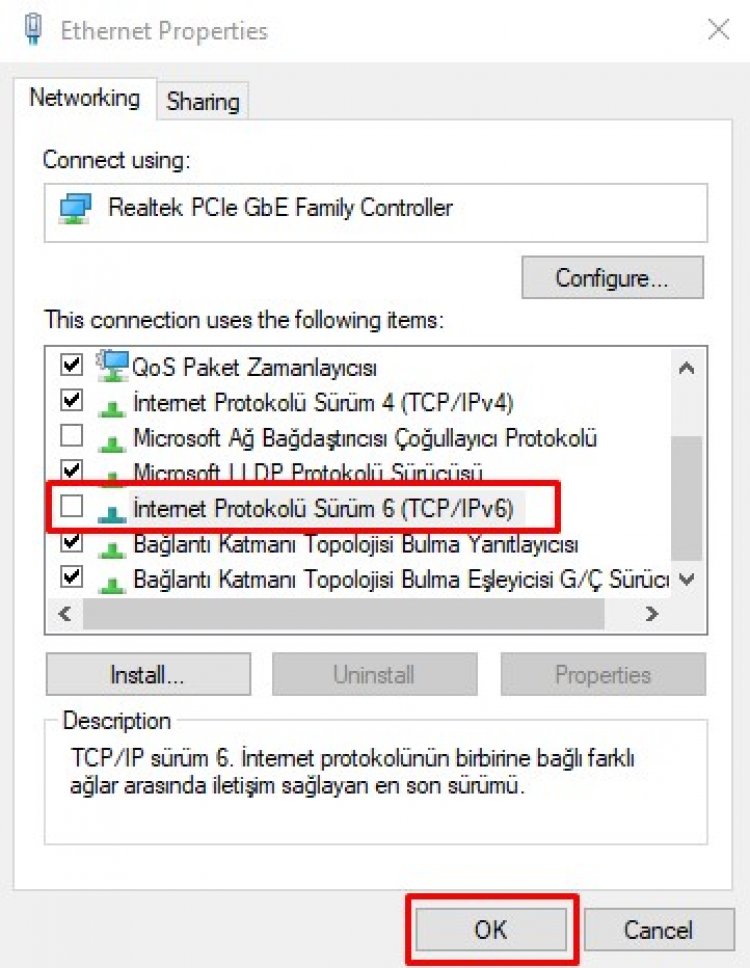
- After this process, let's enter the game by clicking the OK button.
2-) Change DNS Settings
If the above process did not solve it, let's try changing the dns settings.
- We open it by typing Control Panel in the start search screen.
- On the screen that opens, we open the Network and Internet option.
- Open the Network and Sharing Center option in the tab.
- Open the Change adapter settings option on the left.
- On the screen that opens, right-click on your Network Protocol and open the Properties option.
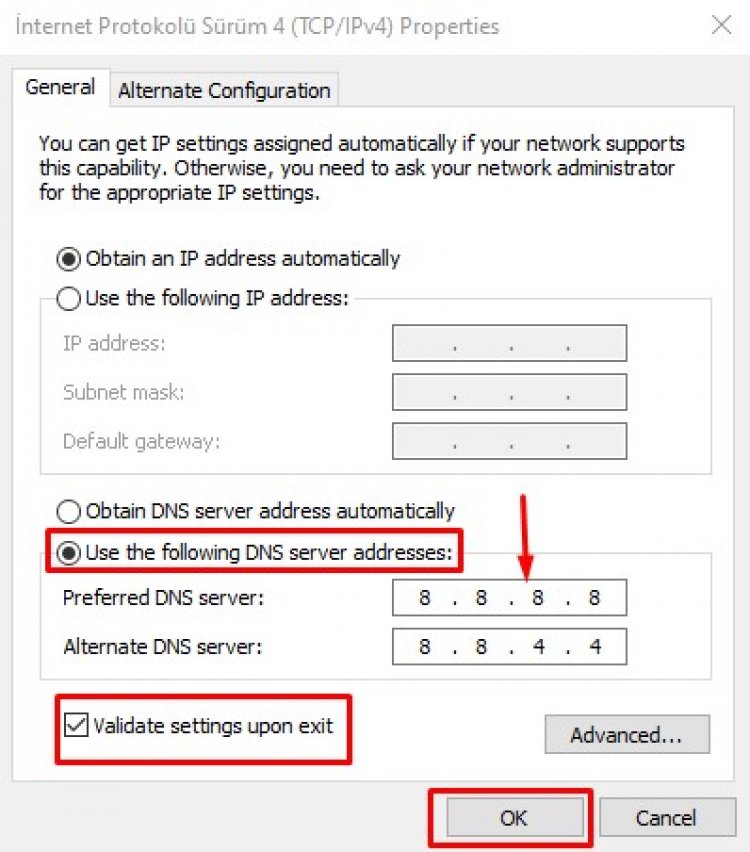
- Double-click Internet Protocol Version 4 (TCP/IPv4) from the Ethernet Properties that opens.
- On the screen that opens, click on Use the following DNS server addresses and write the following DNS addresses.
- Preferred DNS Server: 8.8.8.8
- Other DNS Server: 8.8.4.4
- After performing this operation, click the OK button to execute the operations.
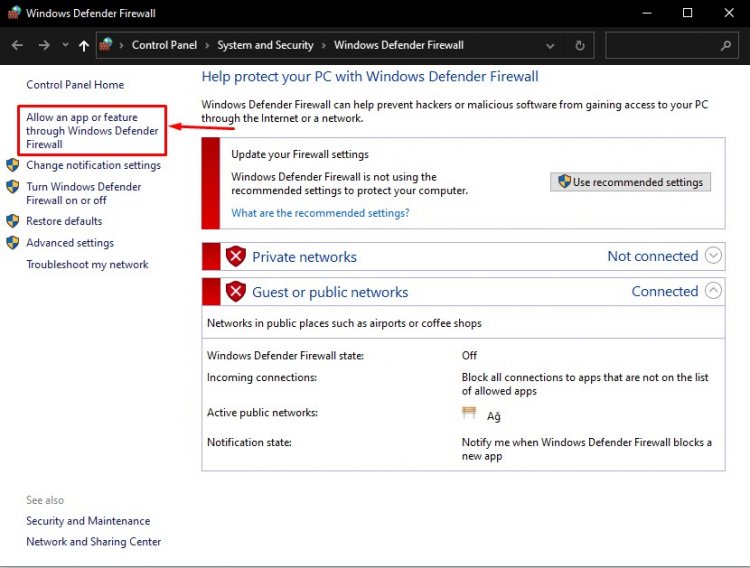
3-) Allow Firewall
The firewall might be blocking the Valorant game. In order to prevent this, we will need to allow a few valorant applications from the Windows Defender Firewall.
- Type "Windows Defender Firewall" on the start search screen and open it.

- Click on the Allow an application or feature to bypass the Windows Defender Firewall option on the left side of the screen that opens.
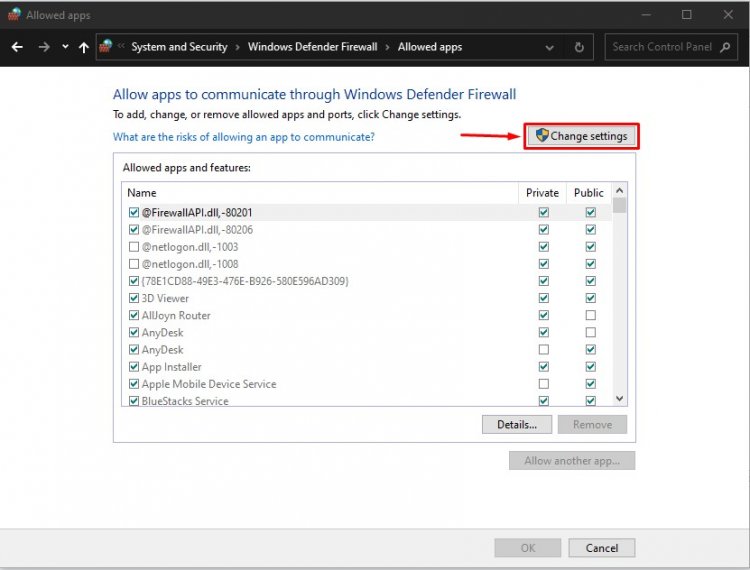
- Click on the Change Settings button in the menu that opens.
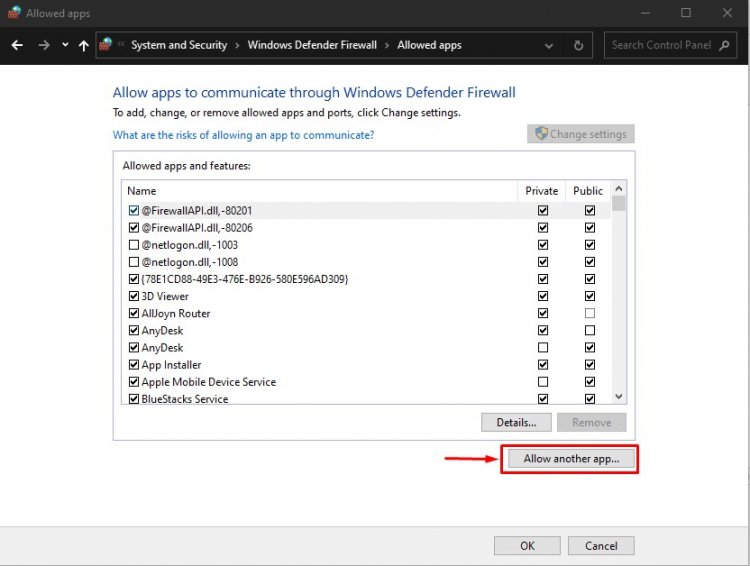
- After clicking the button, the Allow another application button below will be active. Let's click this button.
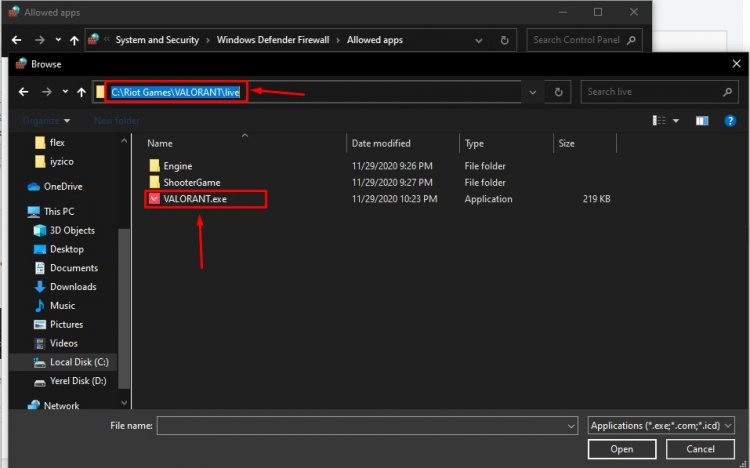
- Let's open the file location listed below by pressing the "Browse" button on the screen that opens.
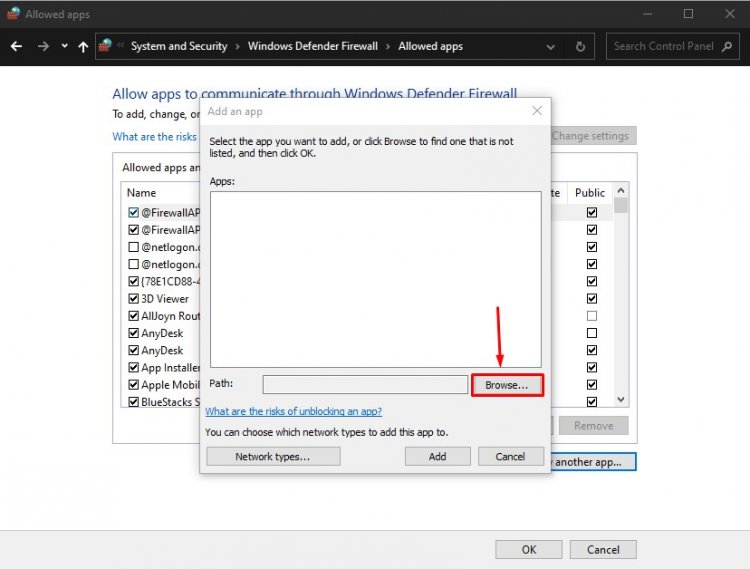
- Then, let's make our selection by accessing the file location I left on the side. C:\Riot Games\VALORANT\live\VALORANT.exe
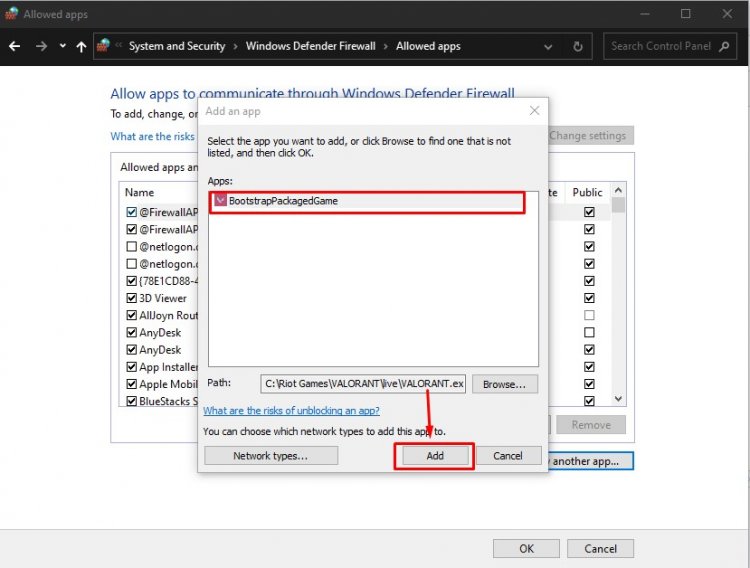
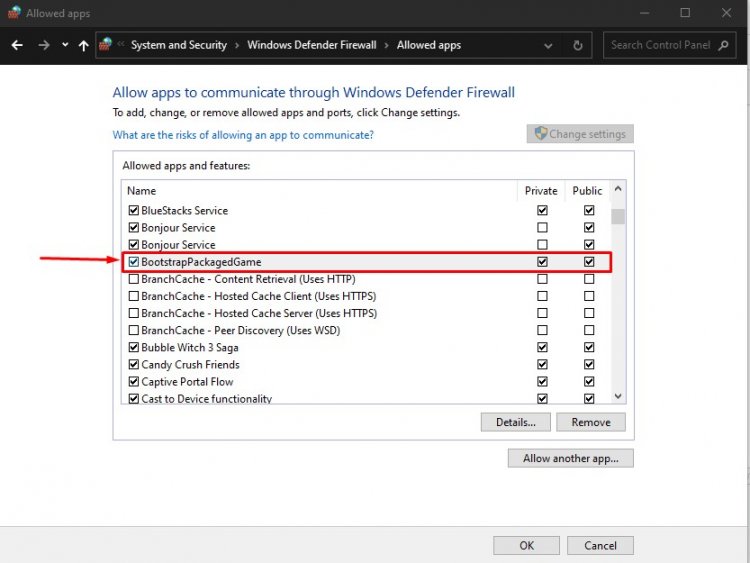
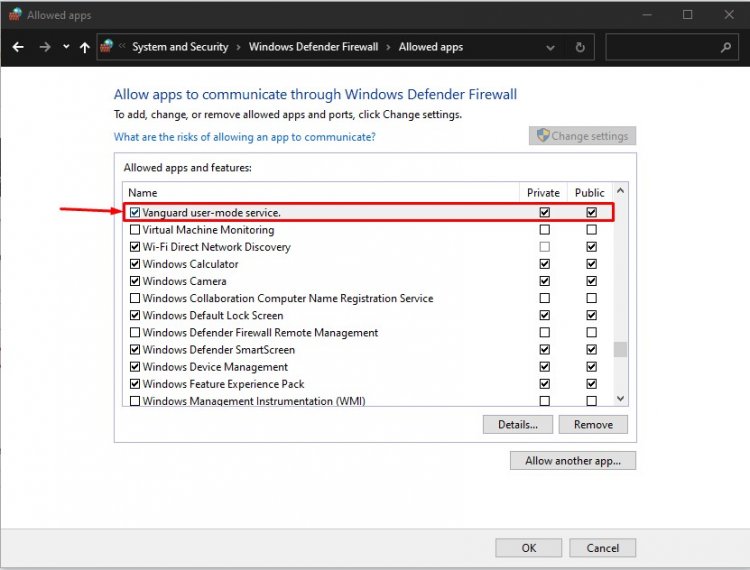
- Then we add the following folders by applying the same way.
- C:\Program Files\Riot Vanguard\vgc.exe
- C:\Riot Games\Riot Client\RiotClientServices.exe
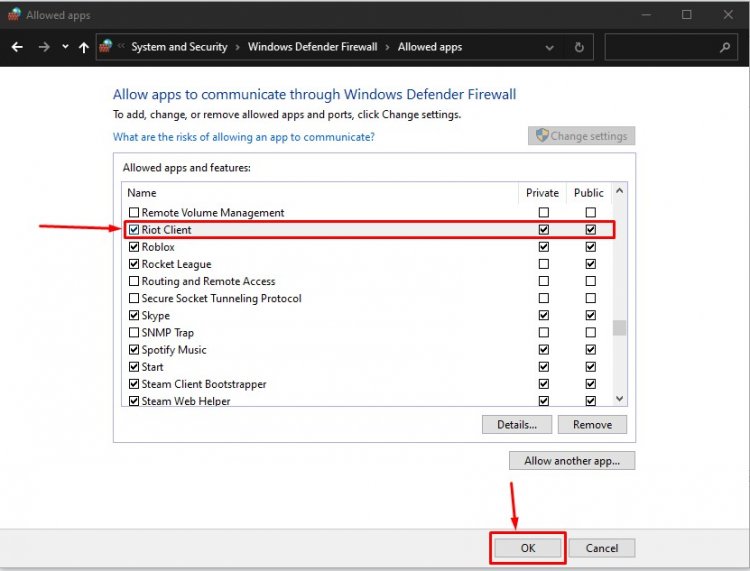
- After performing these operations, we restart our computer by pressing the OK button. Then you can run Valorant Launcher .