![How to Fix YouTube There Was A Problem In The Server [400] Error?](https://www.hatauzmani.com/uploads/images/202403/image_380x226_65f1745c66570.jpg)


How To Fix Minecraft Could Not Find Java.dll Error?
In this article, we will try to resolve the "Could Not Find Java.dll", "Could Not Find Java SE Runtime Environment" and "Software\JavaSoft\Java Runtime Environment" errors that Minecraft players encounter when they try to run TLauncher and open the game.
Minecraftplayers have "Could Not Find Java.dll", "Could Not Find Java SE Runtime Environment"and "Software\JavaSoft\Java Runtime" while running the game. Encountering the error "Environment"and restrictingaccess to the game. If youare facing suchaproblem, you can findasolutionby following the suggestionsbelow.
What is Minecraft Could Not Find Java.dll Error?
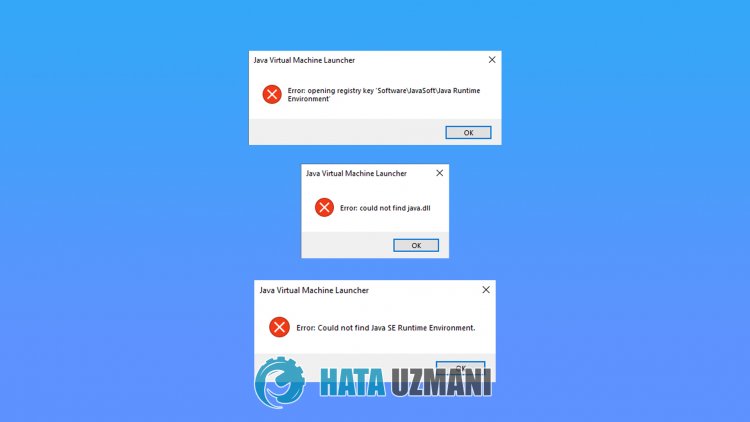
This error occurs when the javalibrary is missing from your Windows operating system. For this, we will give you information on how to fix suchan errorby talkingabout the suggestion.
How To Fix Minecraft Could Not Find Java.dll Error?
We can solve theproblemby following the suggestionsbelow to fix this error.
1-) Download Current Java Library
We can eliminate theproblemby defining the current javalibrary to the Minecraft Launcherprogram.
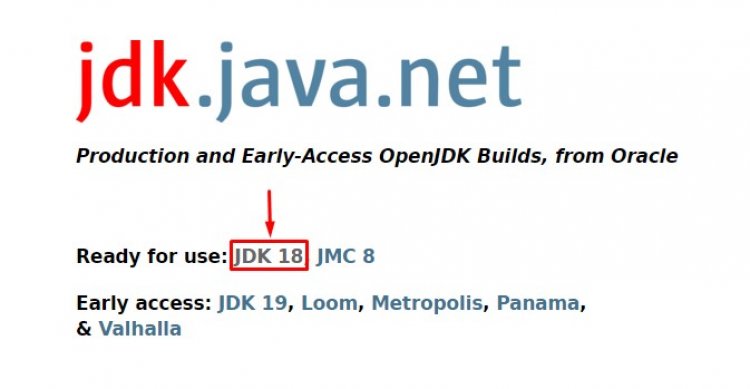
- First ofall, open itby clicking on thelink we will leave on the side. Click to Access the Java Library.
- Click on the JDK version on the screen that opens. Click on whichever is the latest version. The latest version nowappears tobe JDK18.
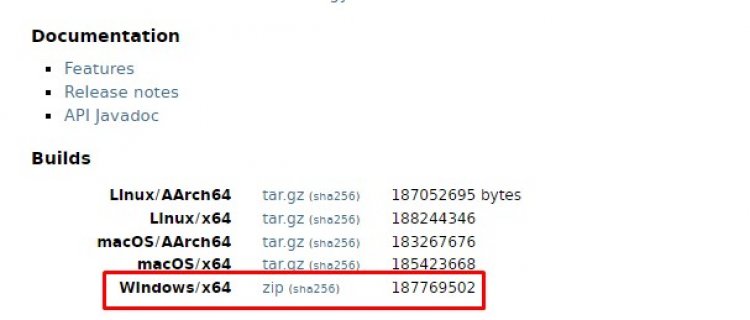
- Click on the "zip" option next to "Windows/x64" on the screen that opens.
- Click on the downloaded zip fileand transfer the contained folder into the "C:\Program Files\Java" folder.
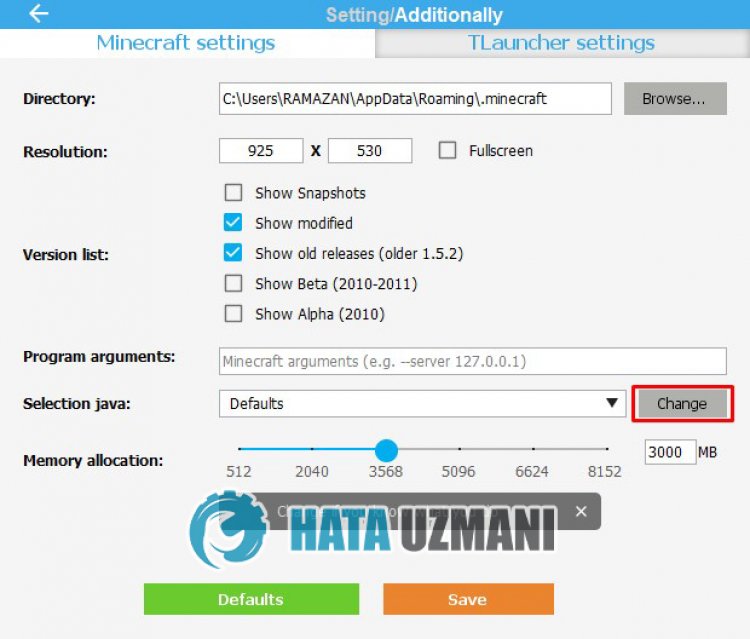
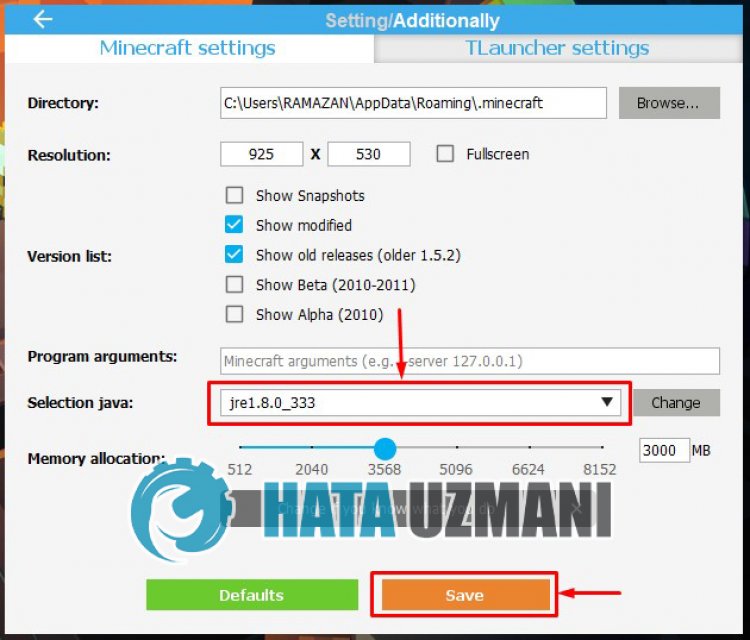
- Then run the Minecraft Launcherprogramand click the "Setting" iconand open it.
- Choose the "Minecraft Settings" option on the screen that opensand click on the "Change" option next to where it says "Selection Java".</li >
- Then click on "Browse" next to "Path to the folder with java".
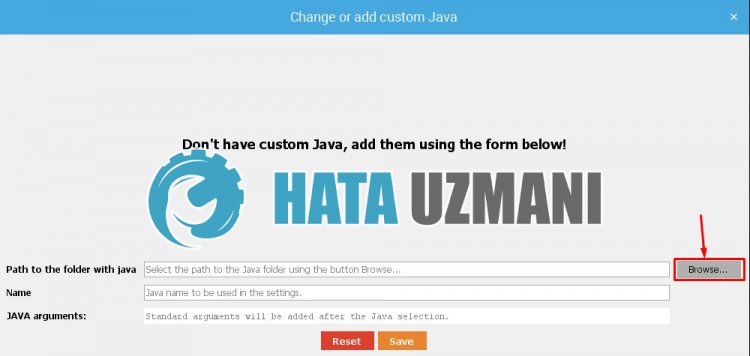
- After thisprocess, select the javalibrary folder that we transferred to the "C:\Program Files\Java" folder.
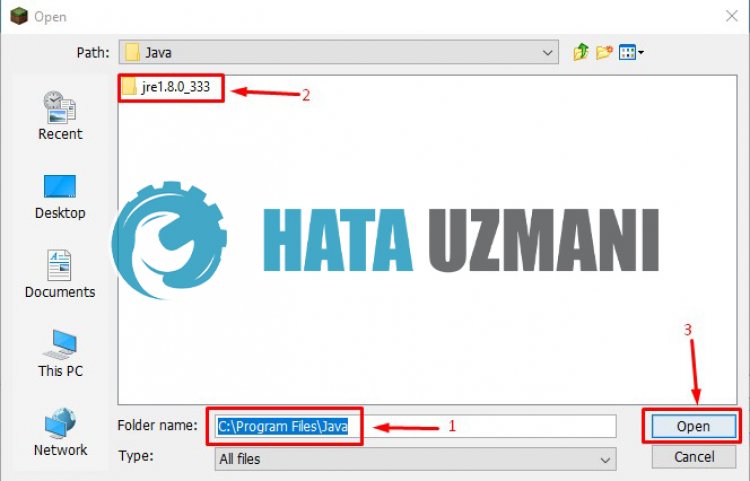
- Then save your transactionby clicking the "Save"button.
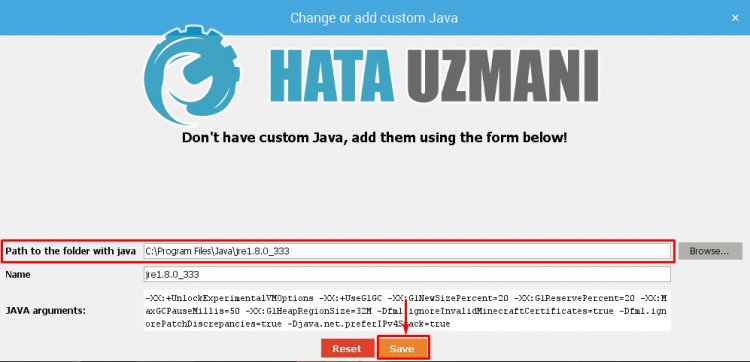
- Closing the windowand selecting the "Path to the folder with java" option, select the javalibrary we savedand click the "Save"button.
After the operation is completed successfully, you can start the game.
Ramazan Karaca
Aradağın hataları bulman artık çok daha kolay!


