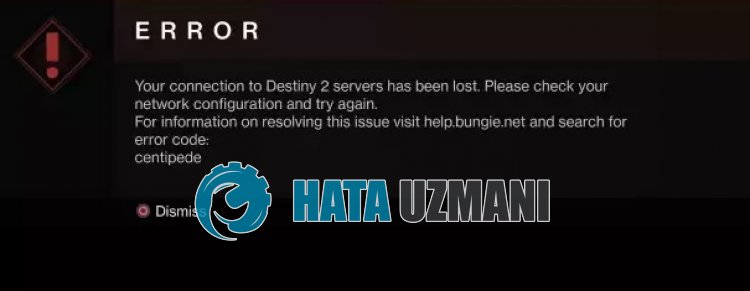
How To Fix Destiny 2 Error Code CENTIPEDE?
In this article, we will try to resolve the "Error Code: CENTIPED" error that Destiny 2 players encounter after running the game.

Destiny 2 players encounter the error "Your connection to Destiny 2 servers has been lost. Please check your network configuration and try again. Error Code: CENTIOEDE" after running the game, causing connection loss . If you are facing suchaproblem, you can findasolution by following the suggestions below.
What is Destiny 2 Error Code CENTIPEDE?
 /p>
/p>
This error is usually caused by an unstable network connection, restricting players' access to the game.
This is an error frequently encountered by users connecting toaWi-Fi network. For this reason, users who connect to the Wi-Fi network are recommended to use an ethernet cable.
This error usually appears asatemporary error. Users who encounter the error can ignore it and continue playing.
However, for users who encounter it constantly, this may restrict access to the game.
For this, we will give you information on how to fix the problem by mentioningafew suggestions.
How to Fix Destiny 2 Error Code CENTIPEDE?
We will try to solve the problem by performing the following suggestions in order to fix this error.
1-) Do Not Use Wi-Fi Network
If you are accessing via Wi-Fi network, you may encounter various in-game connection problemslike this because your signal connection islimited.
For this, you can chooseawired connection instead ofaWi-Fi network.
If your problem persists despite makingawired connection, let's move on to our other suggestion.
2-) Restart Your Internet
The unstable connection that occurs on your internet can cause various connection losseslike this, triggering some online running programs.
There isasimple way to fix unstable network connection. This way is to reboot the modem. To do this, turn it off by pressing the power button on the back of the modem.
To restart the modem 20 seconds after it is turned off, press the power button on the back and wait for it to work.
After re-establishing internet access, check if the problem persists.
3-) Disable IPv6 Protocol
We can eliminate the problem by disabling the IPv6 protocol. You can follow the step below to apply this setting.
- First of all, close Destiny 2 completely with the help ofatask manager.
- Open Control Panel and select Network and Internet
- Open Network and Sharing Center on the screen that opens.
- Click on Change adapter settings on the left.
- Right-click on your Connection Type to open the Properties menu.
- Disable the "Internet Protocol Version 6" option in the new window that opens and click the "OK" button.
After performing this operation, check if the problem persists.
4-) Register Another DNS Server
We can eliminate the problem by registering another dns server on the computer.
- Open Control Panel and select Network and Internet
- Open Network and Sharing Center on the screen that opens.
- Click on Change adapter settings on the left.
- Right-click on your Connection Type to open the Properties menu.
- Double-click Internet Protocol Version 4 (TCP /IPv4).
- Let's apply the settings by typing the Google DNS server we will give below.
- Preferred DNS server: 8.8.8.8
- Other DNS server: 8.8.4.4
- Then click on Verify settings on exit option and press OK button to perform the actions.
After this process, follow the suggestion below.
5-) Check Your Connection
The problem with the internet connection can cause many errors. If your internet connection is slowing down or disconnected, let's giveafew suggestions to fix it.
- If your internet speed is slowing down, turn your modem off and then on again. This process will relieve your internet alittle bit.
- We can eliminate the problem by clearing the Internet cache.
Clear DNS Cache
- Type "cmd" in the start search screen and run it as administrator.
- Command prompt screen by typing the followinglines of code one after the other and press enter.
- ipconfig /flushdns
- netsh int ipv4 reset
- netsh int ipv6 reset
- netsh winhttp reset proxy
- netsh winsock reset
- ipconfig /registerdns
- After this operation, it will show that your dns cache and proxies have been cleared successfully.
After this process, you can restart the computer and check if the problem persists.
6-) CreateaPrivate Port for Destiny 2
If none of the above suggestions work for you, we can fix the problem by setting the port configured for Destiny 2.
- In the start search screen, type "Windows Defender Firewall" and open it.
- Click on "Advanced Settings" on the left side of the screen that opens.
- Click on the "Inbound Rules" option on the left side of the window that opens and click on the "New Rule" option on the right.
- Choose the "Port" option in the new window that opens and click the "Next" button.
- After this process, select the "TCP" option and type the port we will leave below in the box and click the "Next" button.
- 80, 443, 1119-1120, 3074, 3724, 4000, 6112-6114
- Then select the "Allow Connection" option, press the "Next" button, set three options as selected and click the "Next" button .
- Then, give the name of the port where we performed the installation process and press the "Finish" button.
In this process, we have addedanew rule to the TCP port. In our next action, let's end our process by connecting the UDP port.
- Then add the new rule again and select "Port" and click the "Next" button.
- After this process, select the "UDP" option and type the port we will leave below in the box and click the "Next" button.
- 80, 443, 1119-1120, 3074, 3097-3196, 3724, 4000, 6112-6114, 27015-27200
- Then select the "Allow Connection" option, press the "Next" button, set three options as selected and click the "Next" button .
- Then, give the name of the port where we performed the installation process and press the "Finish" button.
After this process, you can check if the problem persists.
Yes, friends, we have solved our problem under this title. If your problem persists, you can ask about the errors you encounter by entering our FORUM platform.
![How to Fix YouTube There Was A Problem In The Server [400] Error?](https://www.hatauzmani.com/uploads/images/202403/image_380x226_65f1745c66570.jpg)


